 PanoRyse
Your first panorama
From a row of overlapping photos to a finished panorama in about ten minutes. The pictures here use the seven-frame "evening meadow" sample set.
Before you start: shooting for a clean stitch
- Overlap neighbouring frames by 25 to 35 %.
- Keep the exposure and white balance fixed (manual mode) if you can. PanoRyse matches exposure and colour between frames, but a fixed exposure is always cleaner.
- Turn around the lens's no-parallax point for close foregrounds; a tripod helps, but handheld rows of distant scenes stitch well too.
1. Import the photos
- Choose Scenic as the mode on the Import tab (or Drone for aerial sets, Night & Astro for night skies).
- Click Open Image Files..., select all the frames, and click Open. You can also drag them onto the window, or onto the window straight from Lightroom's Grid.
- PanoRyse reads the files, finds features and matches the frames in the background. When the frames overlap, the kind chip on the top bar says Panorama and the Modify tab opens on Stitch.
If your photos turn out to be two or more separate panoramas, a window lists the sets it found; you can stitch them one after the other or pick one. If they do not overlap at all, PanoRyse offers photo mode instead (see Editing separate photos).
2. Check the photos
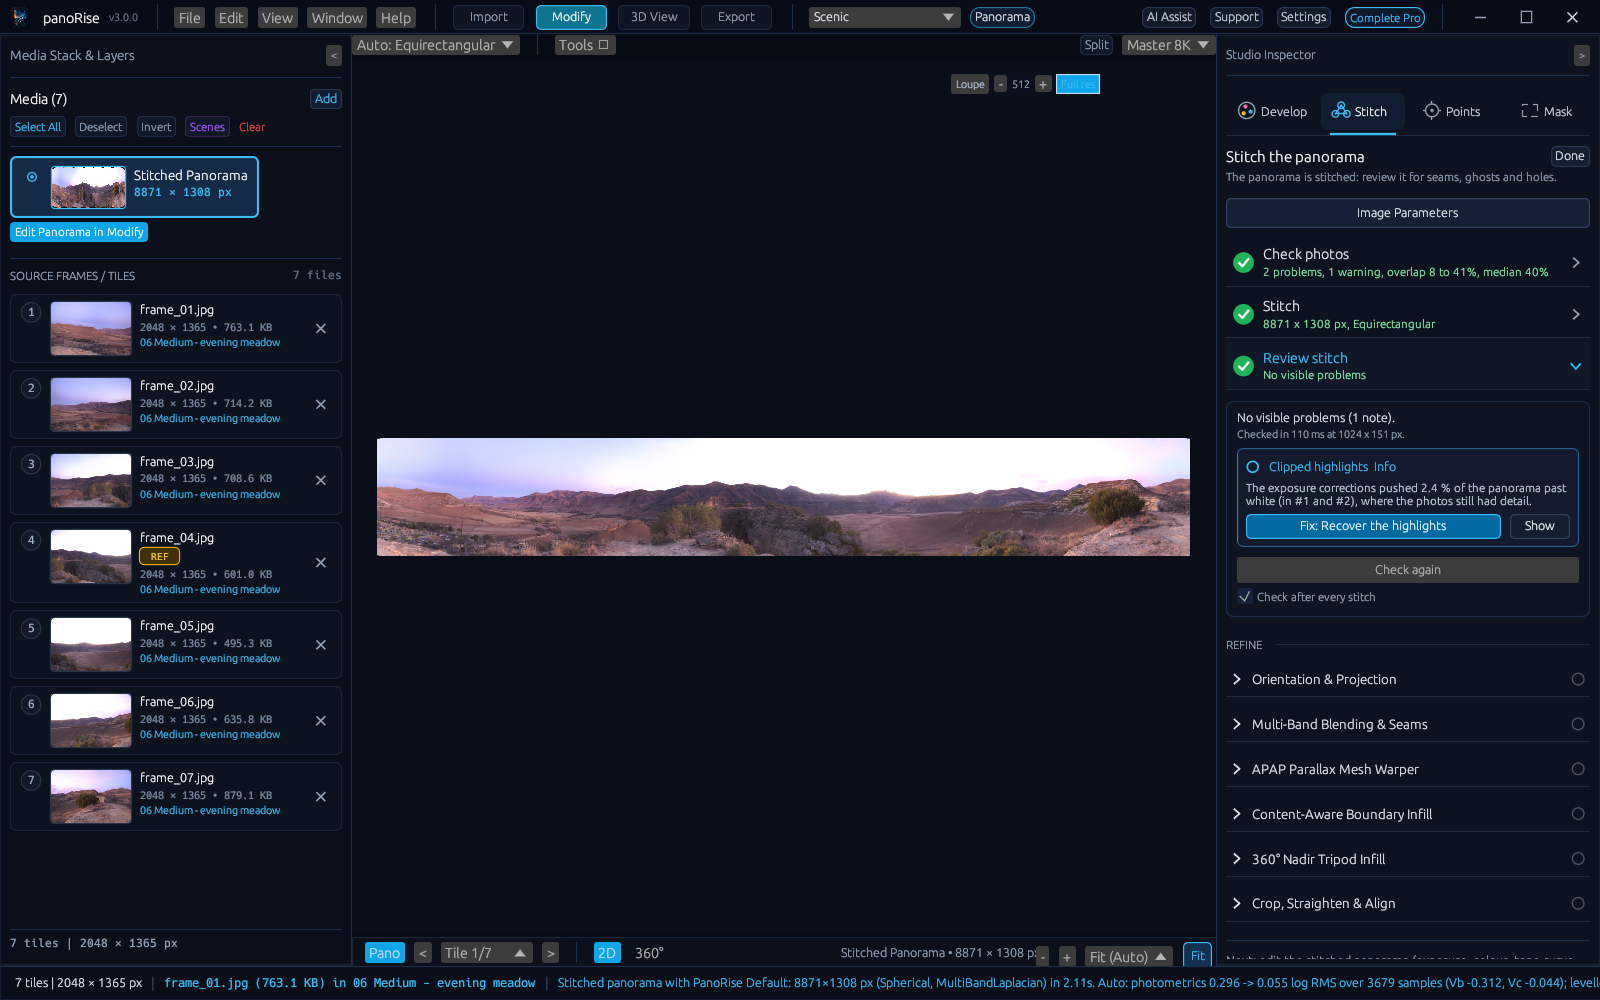
The Stitch inspector reads as three steps: Check photos, Stitch and Review stitch. Each shows a tick when it is done.
Check photos holds the Pre-stitch Check. It looks at the photos themselves before any stitch:
- blurry frames, and motion blur with its direction;
- soft borders (lens softness), black or transparent borders, dark corners;
- exposure outliers;
- the overlap between neighbours, against the 25 to 35 % target.
Each finding has a one-click fix: crop a few percent from the borders of all frames, exclude the blurry frame, correct vignetting, match the exposure, arrange the frames, or add points to a pair. Every fix can be undone with Ctrl+Z.
Arrange frames. For frames with little detail (plain sky, water), Arrange frames shows them on the sphere so you can drag each to its rough place. The next alignment starts from there, and a frame that nothing matches stays where you put it, labelled "placed by hand".
3. Stitch
- Open the Stitch step. The card at the top holds Alignment (Auto (recommended) solves the camera rotations, then blends the seams) and Projection.
- Press the stitch button. Alignment and blending run in the background; the canvas keeps showing the last result until the new one is ready.
- When it finishes, the status line gives the size, the projection, the time it took and the overlap between neighbours ("Overlap between neighbours: 18 to 41 %, median 29 %").
4. Review the stitch
The Stitch Check runs by itself after every stitch (untick Check after every stitch to turn that off). It lists:
- seam halos at frame edges, exposure or colour steps, and clipped highlights;
- ghosting from moving people, cars, water or trees;
- misregistration, holes and 360 degree wrap seams.
Hover a row to outline the problem on the canvas, press Show to frame it, and press Fix to apply the suggested correction and stitch again. Check again re-runs it. AI Assist reads the same report: type "check the stitch" or "why is there a line".
5. Control points (when you need them)
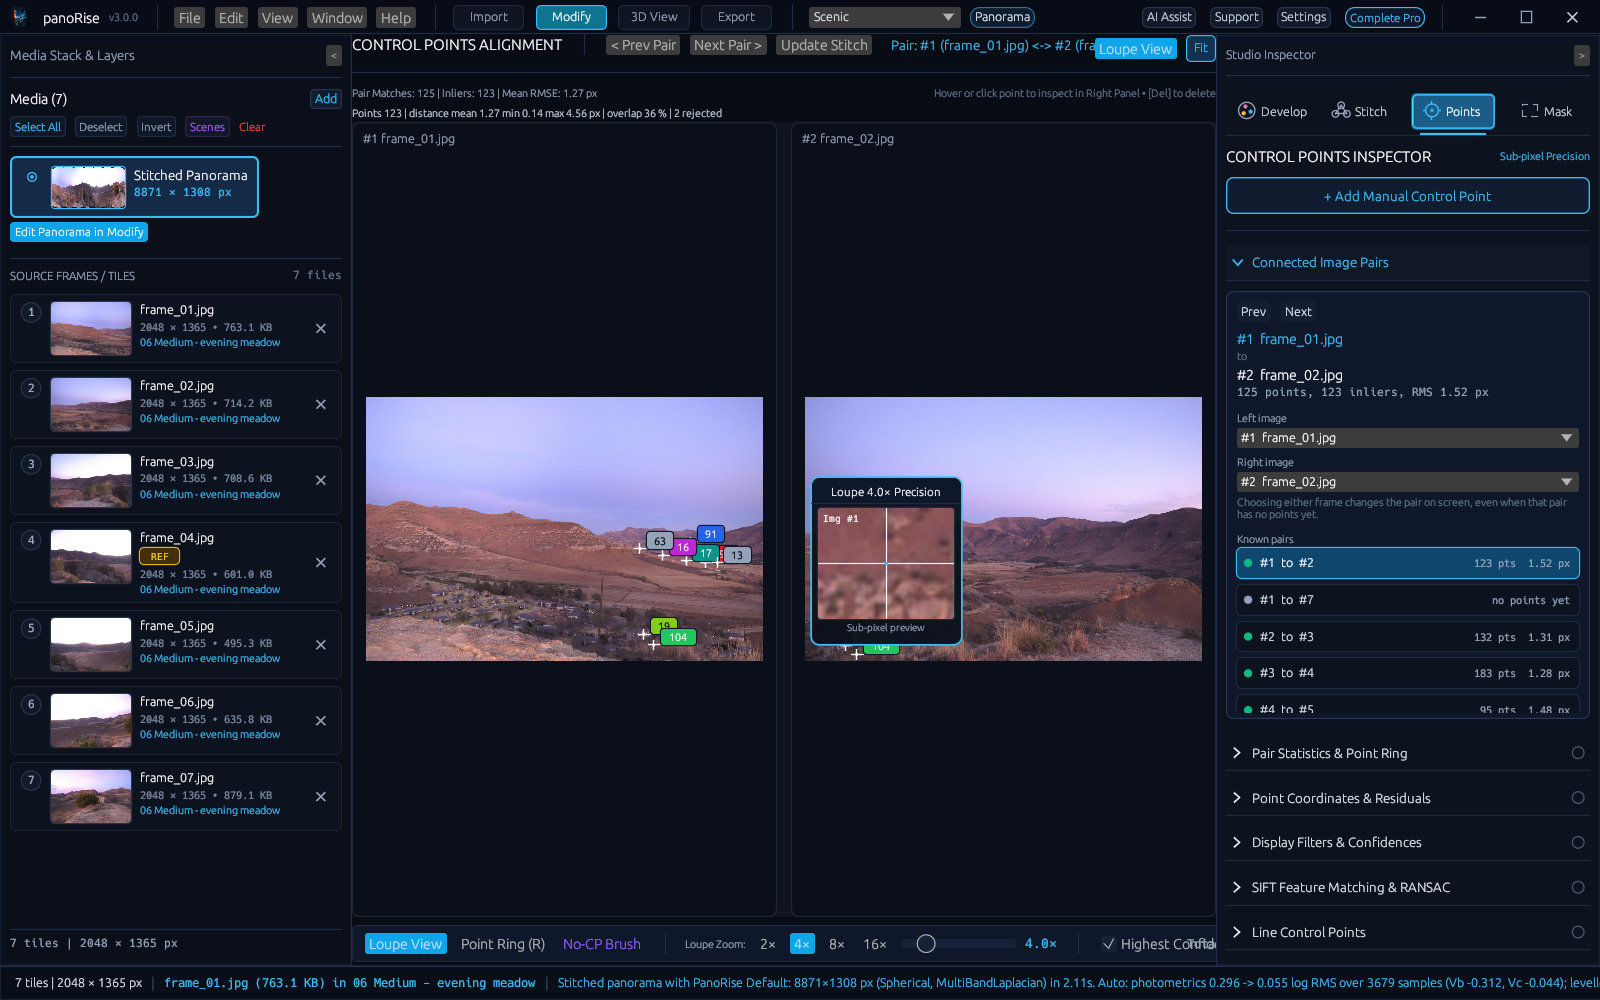
Most sets need no manual work. When a pair is weak or wrong, open Modify > Points:
- Pick a pair of frames. The two frames show side by side with their matches.
- Click a feature in the left frame, then the same feature in the right frame, to add a point. Ctrl+Z removes it again.
- For buildings and horizons, add line points: vertical lines (t1) keep verticals straight, horizontal lines (t2) keep horizons level. Scenic Pro
- Use Prune Outliers to remove bad matches, then stitch again.
Mixed lenses go into lens groups, and close foregrounds can use viewpoint correction; both are in the Stitch settings. Scenic Pro
6. Projection, horizon and crop
- Projection: choose it on the Stitch card or on the canvas toolbar. Changing it redraws without a new alignment. Cylindrical and Spherical suit wide rows and full spheres; Panini and Architectural keep straight lines in wide interiors and streets; Rectilinear suits narrower views.
- Horizon: Auto-level estimates the vertical from the camera motion; Level Horizon in Orientation & Projection levels it again after your edits.
- Crop: Crop, Straighten & Align crops to the largest clean rectangle or to an aspect ratio you choose.
- Holes and edges: Fit to Frame picks the projection that leaves the smallest empty corners, crops to the clean rectangle (drag Crop more / Fill more) and fills what is left with Smart Edge Fill on the Retouch layer; Smart Edge Fill alone fills every empty corner; 360° Nadir Tripod Infill covers the tripod in a full sphere.
If an edit needs a stitched panorama before you have stitched, PanoRyse asks "Stitch the panorama now?" first, so nothing stitches behind your back.
7. Develop
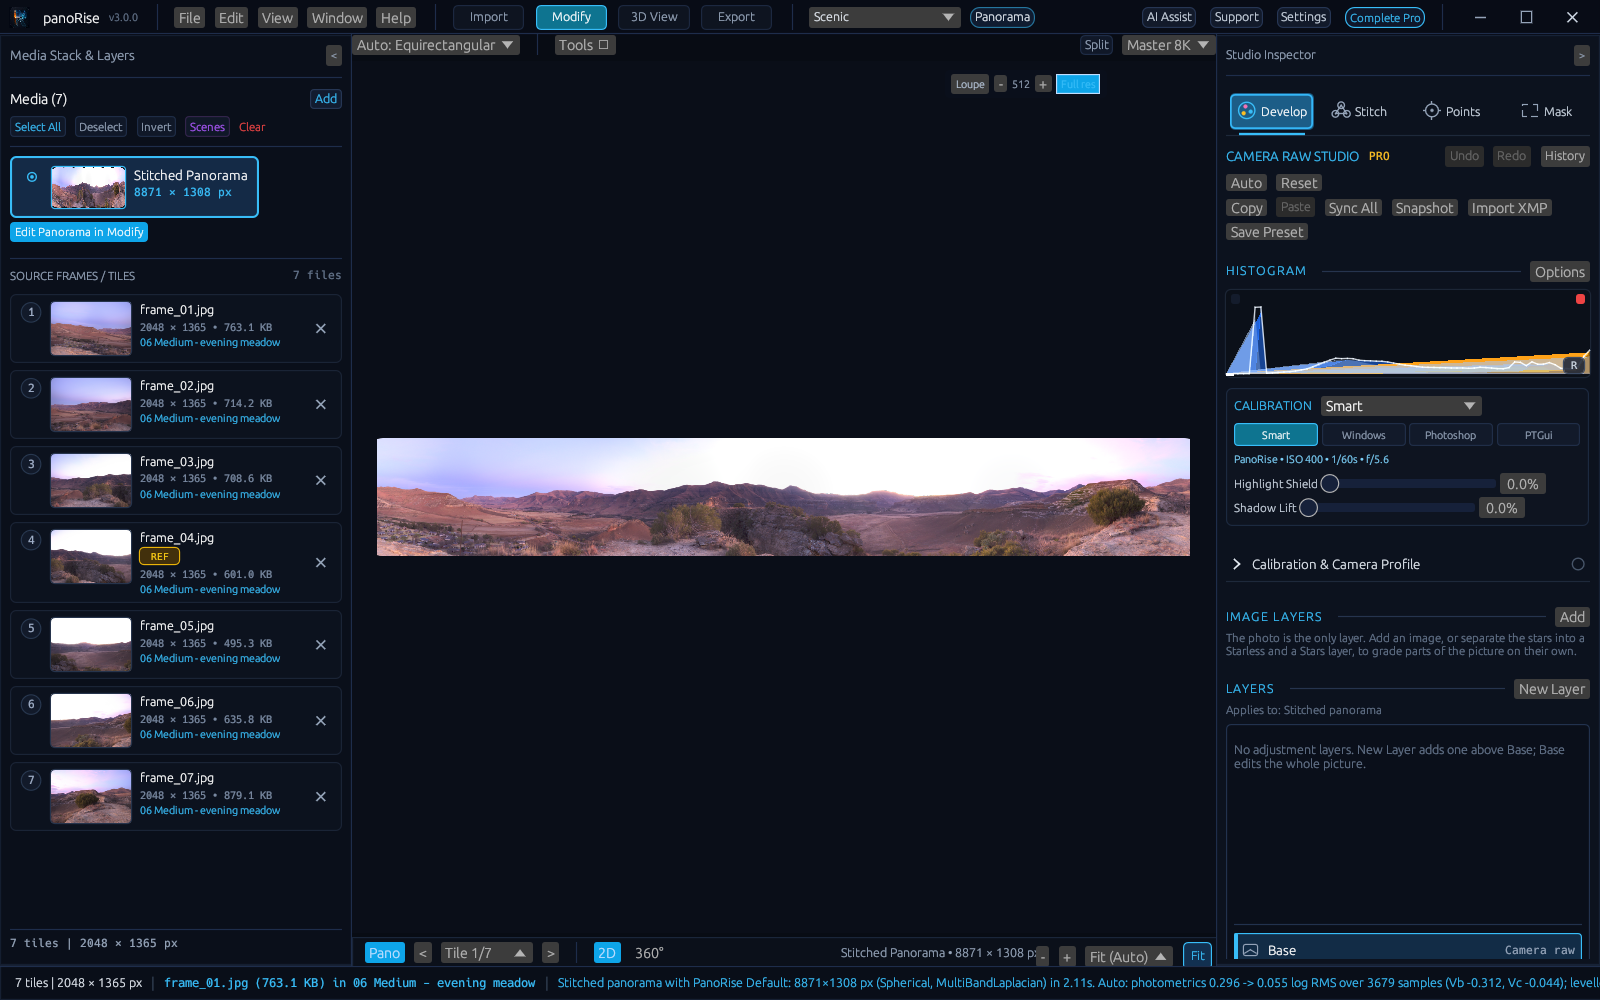
Press Edit Colour & Tone in Develop, or open Modify > Develop.
- Click Base in the layer list to edit the whole picture. Auto sets a starting point.
- Work down the panels: Basic (exposure, contrast, highlights, shadows, whites, blacks, presence), White Balance, HSL, Colour Grading, Detail, Lens Corrections and Transform.
- For local changes, add an adjustment layer with a mask (see Layers and masks).
- Use Snapshot to keep a version, Split on the canvas for before and after, and History to go back to any step.
8. Export
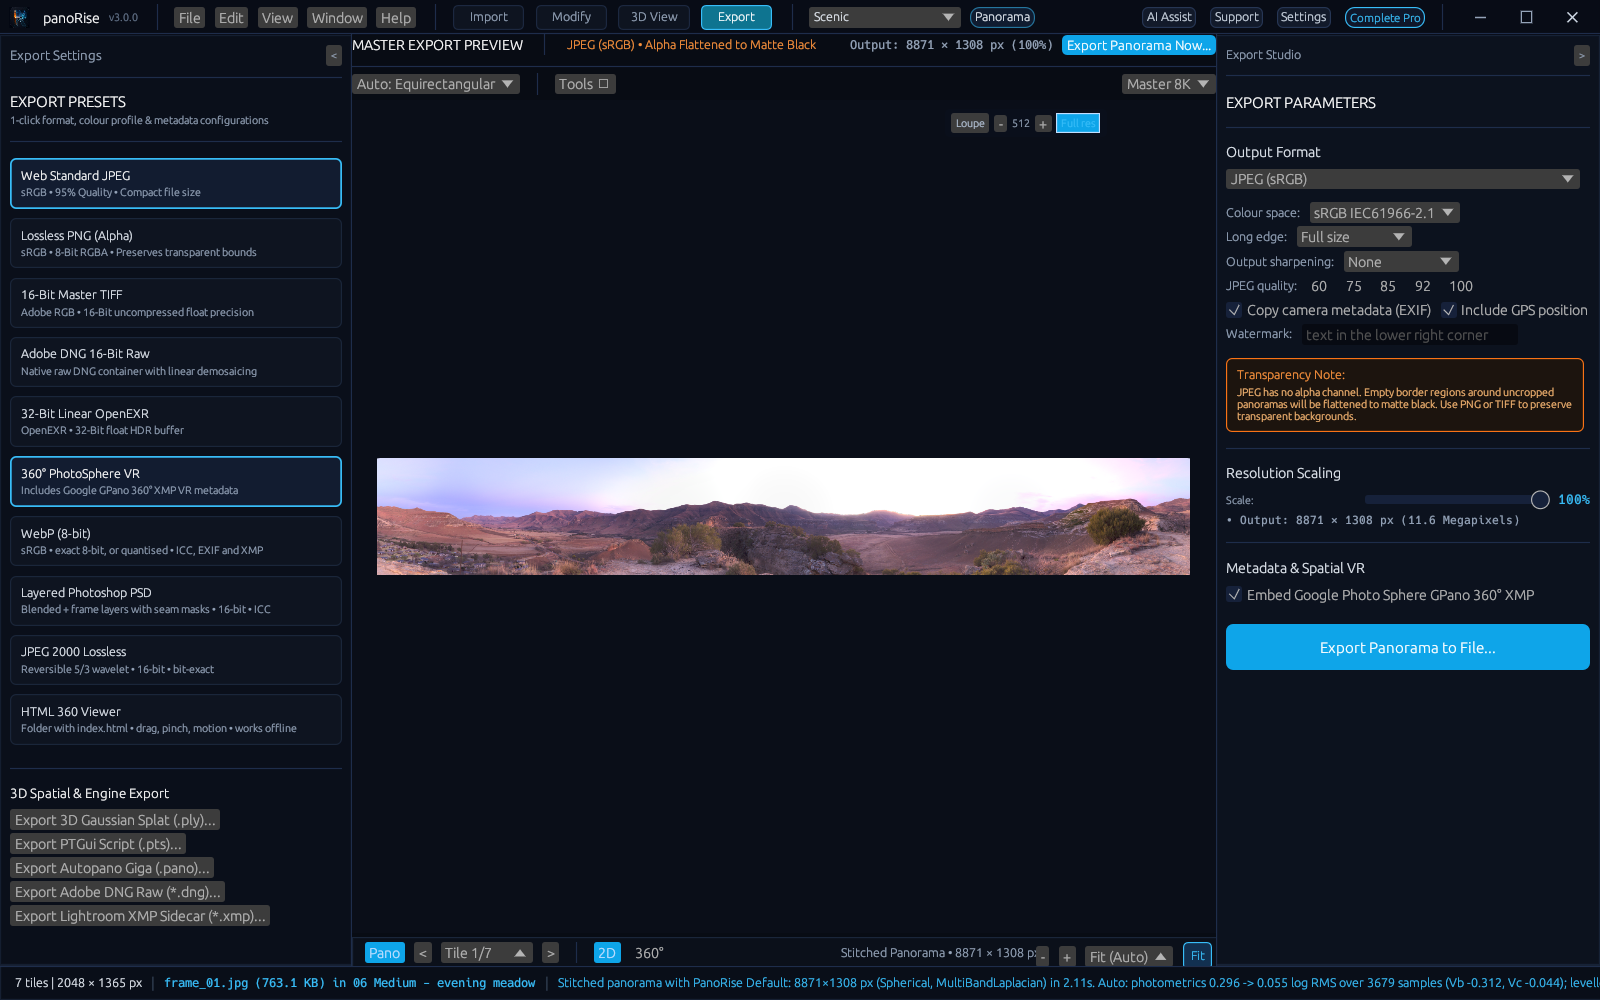
- Open the Export tab.
- Choose a format: JPEG, 16-bit TIFF, Adobe DNG, 32-bit linear EXR, lossless WebP, Photoshop PSD with layers, PSB for very large documents, or JPEG 2000. For spheres there are cube faces, QuickTime VR and an HTML 360 viewer. Very large panoramas go to the gigapixel tiled TIFF or BigTIFF. Free exports go up to 4K (4096 pixels on the long side); larger exports, 8K and up, and PSB need a Pro segment, any of the three Pro.
- Set the size, colour space, sharpening and metadata, then export. What you see is what you export: the file is rendered at full resolution from the same pipeline as the preview.
To keep working later, save the project (File > Save Project, a .panoproj file). PanoRyse also keeps a crash-recovery journal while you work, and offers to restore it if the program closed unexpectedly.